
…from herself.
This is my usual method for enlarging the holes in pearls. The jeweler’s saw works well to help hold the pearls and to saw a larger hole in them. (And it’s an easy job to do while watching TV.) But, when I planned to include pearls on a knotted necklace, strung on a waxed cotton cord, I wanted to find a faster way to make a larger hole.
I realized I already had the knowledge I needed. I could use the same technique I use to drill rocks. (D’oh! Why didn’t this occur to me sooner?)
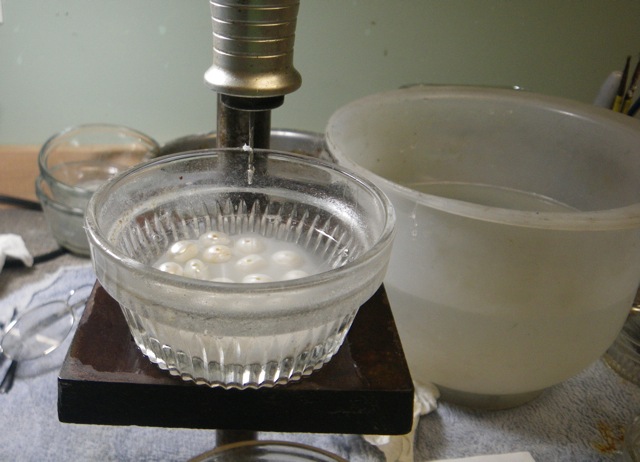
Since the pearls are much softer than rocks, I am able to use a regular twist drill bit in my flexible shaft instead of a diamond drill bit. I use a layer of hot glue in the bottom of a glass dish to hold the pearls. Then I fill the dish with water and drill through the water and pearl to enlarge the hole. I use a pecking motion, moving the drill out of the hole regularly so the water clears the chips from the bit. The water keeps the drill bit cool and contains the pearl dust rather than releasing it into the air.
I have to admit I’ve had a hard time, in the past, getting some of that glue out of the dish to release the stones or pearls after I have drilled them. I figured out a new trick to make the glue layer easy to take out! I spray a thin layer of water in the bottom of the dish as a release agent before I add the hot glue. (Again, d’oh! Why didn’t this occur to me sooner?)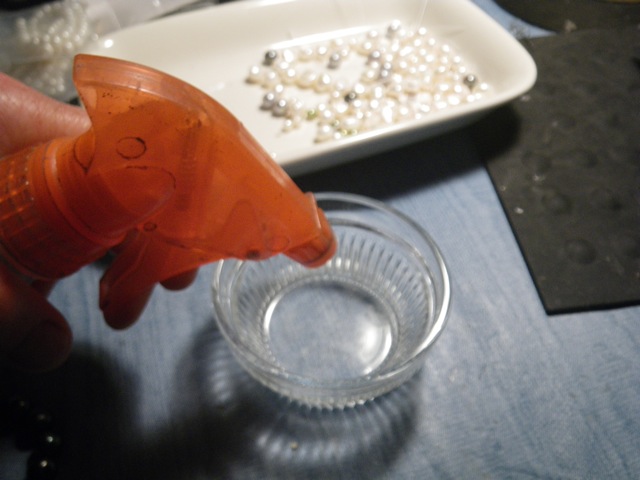
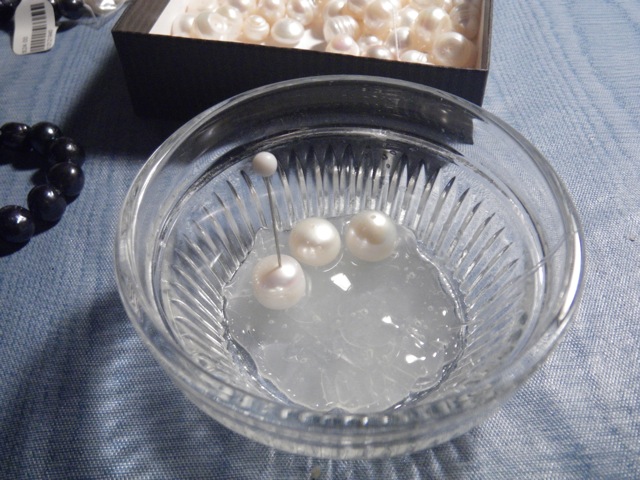
I use a thin layer of hot glue for the pearls, and place them with the help of a straight pin to keep the hole oriented at 90° to the base of the glass dish.

I add water to cover the pearls, and then drill.
The glue layer comes out easily since I sprayed a mist of water, first, as a release agent.

I bend the glue to make it easier to take the pearls out.


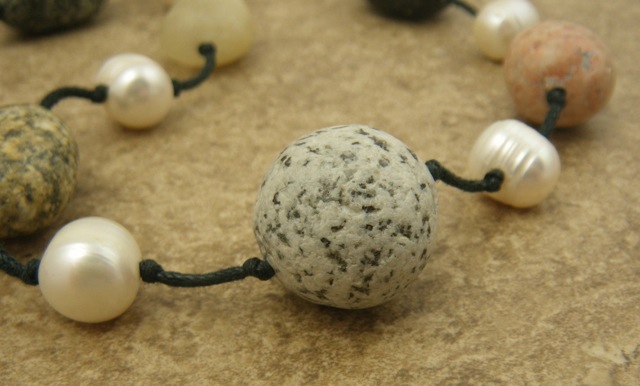
Voila! I now have a selection of large-holed pearls in much less time than it would have taken me to use my saw to make holes this size. I’ll still use the saw when I need to make the pearl holes only slightly larger, but this method is pretty quick when I need a batch of these to knot up with other large hole beads.


Wow! First I reread your post using a saw blade..I would never have thought of that one…not even sure I could do it! Today’s tip is amazing…right down to the spritz of water as release! Thank you for sharing! And BTW, your necklace is stunning!
LikeLiked by 1 person
Hey thanks Patti. What was surprising to me was that I’ve been drilling rocks like that for quite a few years, and I’ve been using the saw to enlarge pearls for at least a couple of years. I never put the two together until last week!
LikeLike
Actually Barb, you are a genius. I have been drilling pearls for years and I use a diamond drill bit holding each pearl with my hand under water and drill.with the other hand. Can you believe it? It was always risky that I would slip and drill through a finger and I was only doing one pearl at a time! It was the only way I could figure out how to do it. Plus – I have to admit – the risky part is always a draw for me. Love you.
LikeLike
Trish! If you end up drilling pearls this way, you’ll have to find a new way to “live on the edge.” How’s western Massachusetts? Maine misses you!
LikeLike
Hear me gasp! I always loved pearls but the holes were always too small. What a great way of doing it! The necklace is stunning.
LikeLike
Thanks Roberta. I have to admit I don’t always get those little pearls lined up just right in the glue. Sometimes I drill through and end up with two holes on the other side, the original smaller one, and the new one I just drilled. But it works out for me 95% of the time.
LikeLike
patricia is right…you ARE a genius….i’ve always said so!
LikeLike
So funny. You know me…my first thought was not: hey, this is kind of clever.
My first thought was: why didn’t I do it this way sooner after drilling rocks for so long.
Miss you lots.
LikeLike
My first thought was, How does she get the dried glue off the pearl? Thanks for answering that question!
LikeLike
Here’s hoping the fairies will build a whole house for you while you are at the beach eating tons of lobster! xo Barb
LikeLike
Pingback: Working to get ready to work | Barbara S Fernald Jewelry
Barb it seems to me not so difficult when you See the picture and explanation, I Will try to drill my pearls under water. But i have a question anyway what kind of glue do you need and use?
Thanks a lot !
LikeLike
Hi Andrea,
I use a regular old hot glue gun with glue sticks like you might use for a number of crafts. I spray the container with a layer of water (as a release agent) so I can get the glue off the bottom of the container easily. Then I squeeze in a layer of hot glue and set up the pearls. The glue hardens as it cools.
Hope this helps!
LikeLike
Wow – what a great idea! I haven’t gotten around to drilling stones, pearls, etc. yet because I couldn’t think of how to hold them safely. Thank you!
LikeLike
Glad you like the idea Natasha! Just make sure you use enough hot glue to set the stones in at least halfway, so they don’t pop out when drilling. I still keep a finger on them while I’m drilling, but the glue helps so much.
LikeLike
Well, well aren’t you a clever “old dog”! Not only did you teach yourself a new trick, you taught another old dog! THANK YOU!!! ;) ;) ;)
LikeLiked by 1 person
That’s a great idea! Do you think it would work for drilling shells? I have the hardest time drilling into snail shells (from the beach, not garden snails) because they either move around too much or crack halfway through.
LikeLike
I haven’t tried it with drilling shells. I wonder if they would be hard to remove from the hot glue without cracking. It’s definitely worth a try. Drilling through the water might help prevent the cracking as you drill.
LikeLike
I usually do drill in water, but snail shells are weird. They are more brittle in spots than they are on others. I’ll let you know how it goes, though, when I try it.
LikeLike
Oh those un cooperative snail shells! Good luck. I would like to know how they come out.
LikeLike
I use my dremel to make holes bigger but the pearl holder that I bought is not very easy. What tool is that you use and what were you using before? Just curious. thanks, Judy
LikeLike
Hi Judy. I use a Foredom flex-shaft for drilling. It’s like a Dremel bit has a floor pedal so I can vary the speed. I still use a jeweler’s saw when I need to only enlarge the holes a little bit. I string the pearls on the saw blade and it holds them in place while I saw around inside the hole to make it a bit bigger. I think there is still a link at the bottom of the post before the comments. (A tip for dealing with those tiny pearl holes)
It has been suggested by several to wear a mask while doing this to avoid breathing in any of the pearl dust.
LikeLike
I tried this method and it was a mess. I used a Drexel. I don’t know what I did wrong. Any suggestions?
LikeLike
Sorry you had trouble with this, Christina. Maybe the problem was in using a Dremel tool. I used a flex-shaft with a foot pedal to be able to control the speed of the drill. I think a Dremel only runs at a set speed, so that may have been the trouble. I like to be able to start drilling slowly.
LikeLike
Thank you so much! Brilliant! I just got some of those new double pearl stud findings (the ones that have a big pearl on the back). I’m using Swarovski pearls for them. I have ruined a few 10mm pearls trying to get them drilled without burning or chipping. I am going to try this method. I have a feeling I will be much more successful this time around. Also, another tip I had to find (since I don’t have a hot glue gun), I took the hot glue sticks, put them in the bowl, then used a heat gun to melt it. I suppose a hair dryer would work too. It would take a long time, but I’m sure it would work. :)
LikeLike
Cool! I hope this works for you, Jessica.
LikeLike
Can u rescue the glue
LikeLike
I haven’t figured out a way to do that yet, Mona.
LikeLike
Hello Barb, I would never have considered glue as a medium as I’d have assumed they would be stuck there forever. I have on occasion used wax to hold smaller objects in place – not so much for drilling but to hold a nut, large seed or other round item in place in order to paint, etch or work on it in some way. It has worked for me, but, unlike the glue, isn’t flexible.
However, if you want to hold a slightly bigger item, wax does work.
Use an egg-cup or silicone cup cake mould, supported in metal tray.
1. Melt a layer of wax into a small container. Refrigerate.
2. Hold your object in place whilst you pour more melted wax around your object.
3. Cover slightly less than half way.
4. Paint or dye your object.
5. Reverse the process if you want full coverage.
I used the wax because I could re-use it, and because I didn’t even consider glue! The wax can crack, but usually it’s still ok to paint, and it stops my object from rolling around. Great lateral thinking Barb!
LikeLike
Wow, thanks for the suggestion, Rael!
LikeLike
BRILLIANT ! ! ! BRILLIANT ! ! ! BRILLIANT ! ! ! Thank you sooooooo much for sharing. I have recently purchased a string of baroque pearl crosses with several ideas in my feverish wittle brain. Big step: the hole. Go figure. Thank you again, so very much, for sharing.
LikeLike
Great! Hope it helps for your pearls! They sound spectacular!
LikeLike
Hi Barb,
I was looking up different drilling techniques and stumbled on your post. Have you tried using Jett Fixturing Compound from Rio? I plan on buying some. It would seem to do the trick, and it’s reusable, although, I don’t know how I would keep it stationary in a container under water. Maybe a dab of glue under the fixturing compound.
Thank you for sharing your techniques!
LikeLike
Hi Saadia, I haven’t tried the Jett Fixturing compound. I’d be interested to know how it works for you. I like the idea of reusable. I usually end up holding the glued rocks with one hand while drilling, just as a precaution. I don’t have to hold them tightly, but just hold the glue and rocks in place with downward pressure. That might work with the fixturing compound. Happy drilling!
LikeLike
You should explain that pearl dust is toxic released into the air if breathed in thus always drill under water to prevent airborne pearl dust.
LikeLike
Thank you Cindy. A good point.
LikeLike
Thanks for this amazingly ingenious idea! There is always more than one way to skin a banana (the cat reference turns my tummy). You are so creative, lovey jewelry. Thanks again!
LikeLike
Thanks, Justina!
LikeLike
Thanks for this amazingly ingenious idea! There is always more than one way to skin a banana (the cat reference turns my tummy). You are so creative, lovely jewelry. Thanks again!
LikeLike
Dear Barbara
Thank you for this post. I want to make pearl and leather jewelry.
Lots of pearls but holes to small thank you.
Cindy
LikeLiked by 1 person
Dear Barbara, great idea thank you for putting it out there. Another way to hold down a piece in a dish covering your object with water is by using “sticky tack”. It’s the stuff that holds posters on to walls and comes off with out destroying the wall. It is reusable when dried and works fairly well. I’ve used it to drill beach glass to use in my silversmithing work. Thank you again great idea. Teri
LikeLike
Thanks, Teri. I’ll have to try the sticky tack. The one thing I don’t like about the hot glue is that it only has a one time use.
LikeLike
Brilliant idea I will be giving it ago
LikeLike