
I have this habit of buying tools I think I need, and then setting them aside. This is because I am either daunted by a new learning curve or the tool was an impulse buy and I can’t quite remember why it was so important that I had to have it. I bought this riveting tool in December and just got around to giving it a try yesterday. Silly me. The learning curve was not steep at all and I’m sure I will find the tool quite useful.

The recommendation was to set the tool into a vise. Hey, I had one of those. Bought on impulse. Never used. Until yesterday. (Yes, I’m an impulse buyer. But I eventually use 95% of these tools at some point. It was so satisfying to need a small vise and just happen to have one on hand.)

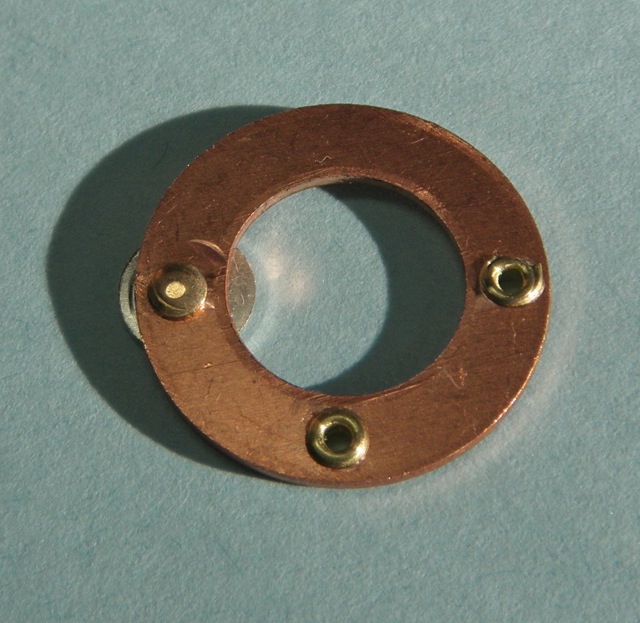
If you’re thinking of getting one of these, the vise helps a lot. I can’t imagine trying to use this tool while holding it in my hand. The right side of the tool has a punching mechanism and the left side sets the rivet by flaring it. This device is designed for tube rivets. An assortment of open end and closed end tubes come with the tool.

As with any rivet, the length is the key. Too short and there won’t be enough (rivet) metal overlapping the hole to keep the rivet in place. Too long and the rivet will bend, causing an improper fit between the two pieces being riveted. Here are my first attempts:
The very first rivet is the one at “3 o’clock.” I was in such a hurry to get going I didn’t take the time to make sure everything was seated right or lined up before I screwed down the flaring tool. The flare is ragged and off center.

On the back side, at the “9 o’clock” position, there are marks from screwing down too hard. Part of the learning curve: knowing when to stop. At 3 o’clock you can see the results of a rivet that was too long. There was too much metal to flare properly and the excess hangs out leaving a rough edge. The rivet at 6’oclock looks like it is properly done. (One out of three at the beginning. Not too steep to learn.)
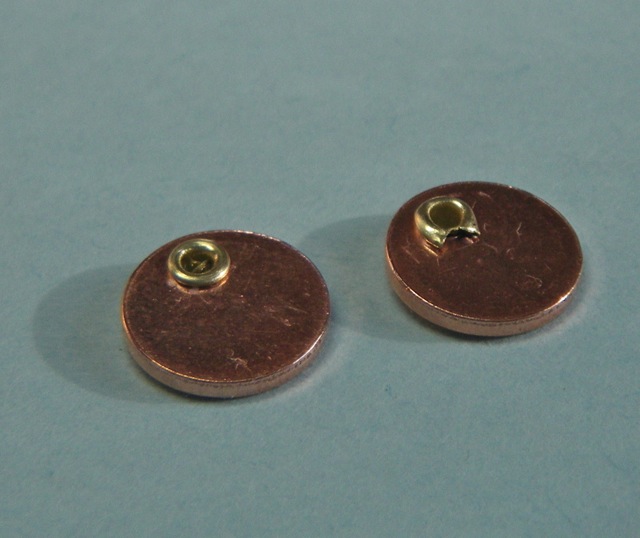
From trying this tool and from having made my own wire rivets, I have to say that I like using solid wire rivets better for attaching two pieces of metal. But, you will notice that most of my attempts with this riveting tool were to set a decorative rivet in one layer of metal. I like the look of this eyelet creating a finished hole. I plan to make and patina a number of different base metal “doo-dads” to combine with silver. I think having a mixed metal eyelet in the piece will add that extra bit of detail I’m looking for.

As long as I get the length of the rivet right. In the case of the piece on the right, below, the rivet was too short. Not enough metal to make a smooth even flare. (The front looks okay because the rivets come with one end already flared.)
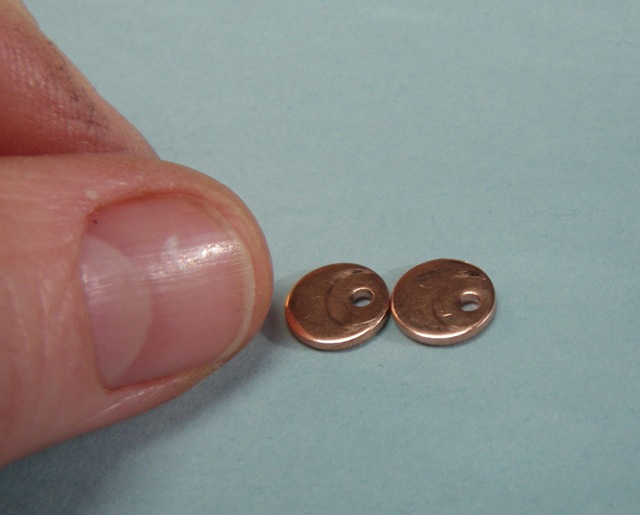
One of the attractions of this tool is the ability to easily line up very small pieces of metal and punch a decent sized hole in it. I end up having quite a few small discs around from using my disc cutter. The pieces above are 18 gauge which is thicker than I would usually work with in this case. But it’s really hard to hold a tiny pice in place to drill it with a flex shaft or Dremel. The pieces get too hot, even with lubricant on the drill bit. So, this tool is perfect for making holes.

I realize now that I could have bought really good hole punching pliers for 1/3 of the price of this tool. I know that’s what I’ll use it for the most. So, to get my money’s worth, I’m going to have to be creative in thinking of all the different ways to use these nice brass tube rivets. That doesn’t sound like such a bad thing after all.
Meanwhile, at 11:30 a.m. Eastern time, Bruce has the generator running to test it out. Gas cans are filled. Slow cooking spare ribs are about to go in the oven. I’ll get bread from the freezer to go with the lentil soup I’m making for tomorrow night. It’s so weird to hear the blizzard warnings and predictions of 2 feet of snow. Beal and Bunker boats are running today but the 5 p.m. commuter boat is canceled. We won’t count on any boats running tomorrow!
I’ll be sure to post pictures if we don’t lose power. We’ll still have our generator to use, but if the power’s off the internet signal is gone. Stay safe everyone! Find your skis and snow shoes!


