Tag Archives: earring components

A weird thing happens…

…when I neglect my blog. The longer I go without posting something, the harder it is to think I have something to post. I start second guessing anything I might want to say, or any photos I might want to post and then more time goes by. I get out of practice. Then I feel like I should justify how I spent my time in the last month when I didn’t blog. Sheesh. I am my own worst critic.

Life on this tiny island in Maine is crazy busy in May and June as we get ready for the summer rush of business, activities, friends, and family. I’ve been working in the studio, getting jewelry into galleries, weeding the perennial garden, planting some vegetables, spending time with my Mom, painting the bathroom, taking a two-day trip to NYC, and catching up with friends who have arrived for the summer. Who knows where the time goes. It just does. So, I’m jumping back into the blog pool and letting go of why I did or didn’t do it for over a month.

Part of my process in making jewelry is to make up a batch of components to mix and match in earring and necklace designs. I cut, hammered, and tumbled some brass discs to get them ready for applying patina. I also soldered some 14 gauge  (it might be 16)  copper wire rings and hammered them flat.

IMGP4482


Next I applied some patina solutions.

IMGP4486 IMGP4485


When they are sanded, sealed with lacquer, and finished with a preservation wax, they will be ready to use in earring designs like the one below.

IMGP3907


So that’s a little bit of what I’ve been up to.  And, I’ve missed telling you about it.

10 Comments

Filed under Uncategorized

At last. Back to work with PMC.

I feel like I’ve been away from my studio for a long time. Last week I finally started to get back into the swing of things. I have a number of designs in my head, but I wanted some silver components to include in the finished pieces. What a great feeling to get out my precious metal clay, start listening to a new book on CD, and spend a couple days cranking out some of the beads and components I’ll be using this week.

Leaves are a recurring theme for me. I like the simple lines of the bunchberry leaf because it looks great on its own and it combines well with other shapes. So, the first components I made were from the familiar leaves that grow along the side of the road by my house.

Next, some small textured teardrop shapes. (Hmmm, kind of like an inverted leaf!)

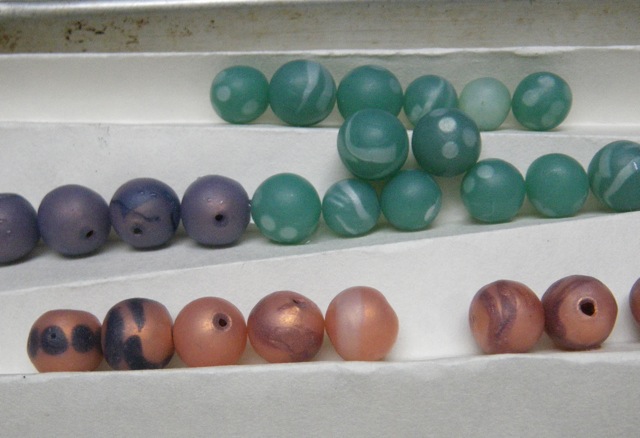
I also made several shapes of my hollow silver rock beads, and some flat and domed spacer beads. Here’s the kiln load, before any of the finishing steps. I know, the dish towel looks a little gross.

Why make flat spacer beads with expensive PMC when they could be chopped out with a disc cutter? Because I can make them thicker than the gauge of sheet metal I would be able to cut out with a disc cutter, the holes are easy to drill before firing, and I make the flat spacers out of rehydrated PMC scraps. I can tumble them for a good long time and the edges will sparkle. I use the spacer for accents, so most of what you see are the edges. I’ve never been able to get that reconstituted clay to be as smooth as fresh clay. It doesn’t take a texture as well, and it is more porous. I learned this spacer trick from Fred Woell, and I use it a lot when I have old clay scraps I want to rehydrate.

With this batch of components I also wanted to try something I read about on Vickie Hallmark’s blog.  She has shared a lot of information about fusing Argentium with fine silver and sterling silver metal clay. (Argentium is sterling silver, but instead of sterling as an alloy of fine silver and copper, it is an alloy of fine silver and germanium.) I fuse Argentium wire to make my own closed jump rings and chains, but I have never tried fusing Argentium to any of my fired PMC pieces.

I used to solder the ends of sterling silver wire to the edges of these leaves to have an attached wire for making a wrapped loop of an earring.  It was hard to hold the wire in place while waiting for the solder to flow, and I usually ended up with solder flowing onto the front of a few leaves. That is not where I would ever want to see it. (Oy, I hate to solder!) Then I tried imbedding fine silver wire in a small ball of clay at the back of the leaves so I could fire the wire in place, omitting the need for soldering. This worked okay, but it used more clay than I wanted on such a thin leaf, and the softer fine silver wire did not have the strength I wanted for an earring. Even with work hardening, there was a little weak spot where the wire went into the clay and I couldn’t reach it to harden with a hammer or burnisher.

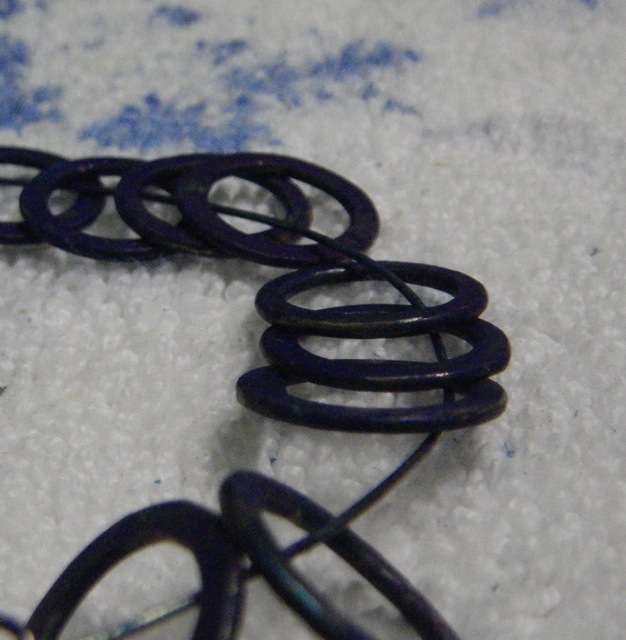
So today, I coiled a bunch of Argentium wire ends (20 ga), hammered them, and set them on top of the leaves on a fire brick, and fused them with my torch. There was a little trial and error with overheating the wire, but I quickly got the hang of it. It was so much faster than soldering and so much stronger than imbedded fine silver.

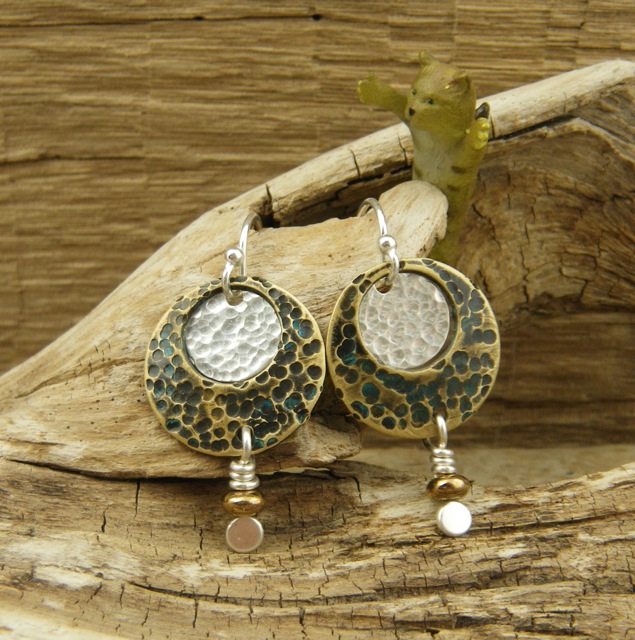
Tomorrow, these pieces will all get a little liver of sulfur bath and  some hand polishing. Then they’ll be ready for jewelry action.

Thank you Vickie Hallmark and everyone else who shares information so generously on their blogs! I have learned some of my favorite new techniques and gained so much inspiration from reading the blogs of other artists. I hope I am paying it forward with my own blog.

16 Comments

Filed under Uncategorized

Embedments

As part of my translucent clay experiments, I embedded bits of hammered wire and opaque clay between rolled layers of translucent clay. The layers were rolled to #3 on my pasta machine.

Discovery: Unless using the wire in a mechanical part of the design, it seems a waste of metal to embed it.  Especially when using silver.

I was much happier with the look of pearlized white clay beneath a translucent layer, as in the round beads at the top of the photo below. To me the dots and lines show  up well, and the pearlized white clay resembles silver, or what I hoped the silver would look beneath the translucent clay.

The beads in the lower part of the photo are copper beads covered with a layer of translucent clay  tinted with “Salmon” colored alcohol ink. I was surprised at how the salmon color seemed to disappear when layered over the copper. In the mid-left of the photo are more copper beads covered with a layer of blue tinted translucent clay. It looks more purple than I thought it would.

Earring components from a random mix of green and blue alcohol inks. I’m not sure what this color would be called, but I used it as a base for the earring pieces. I made a design with black and white and added a very thin layer of the grayish green translucent clay on top. (I’m pretty sure this was Premo clay because I could bend these pieces almost in half without then breaking or cracking. The Pardo pieces were firmer after firing.)

As an experiment, I liked the way they came out. By chance, I think the smokey greenish color will mix well with silver findings. But, I really am at a loss when thinking about mixing color. I have no art background, so a color wheel memory is not readily available to me. (I think a little color wheel on the wall of my studio would be a good aid to my polymer clay experiments.)

Below, I placed a white unglazed ceramic disc between two layers of Pardo translucent clay. With the milky aspect of the clay before firing, I had no confidence about this turning into an interesting bead. So, I only made one. (duh, not thinking)

The disc bead, after firing, was a pleasant surprise. I plan to make more of these in a variety of translucent colors.

Imbedding? Embedding? As a “wordsmith wannabe” I had to determine which word is the correct one to use. Like Pardo and Premo translucent clay, either one can be used.  Both are correct. The choice is up to the user!


4 Comments

Filed under Uncategorized

Wax on Wax off

Applying Renaissance Wax as a final finish on pieces with patina is how I spent part of a sunny afternoon on the back porch. It was so nice to hear all the birds singing, especially the cardinals and song sparrows, and it was pleasantly promising to feel 60 degree air again. It was also a relief to work outside since the smell of this wax is not one of my favorites. Fortunately the smell is gone after it hardens. It’s not that bad, but I’m sensitive to it. As long as I was outside, I took the time to apply Butcher’s Wax as a final finish to a batch of beach rocks I drilled earlier in the week. Butcher’s smells a little better, but still it was a nice change to keep that outside, too.

So, I did lots of hand finishing this afternoon, which is a good thing for 2 reasons. The first is that I now have a bunch of new components to work with in the studio tomorrow, and the second is that I procrastinated all day from writing my “Cranberry Report” for the Working Waterfront, and completing a variety of components made me feel like I had done something productive. I might stay up late to finish the column tonight, so I don’t have a repeat of procrastination tomorrow. Ugh. I always do this when I have to write. I had hoped that keeping up with a daily post on the blog would be helpful to writing my column in a more timely manner. But…not yet. Not this month, anyway. Tomorrow is my deadline, but I usually stretch the day of the deadline out until 5 p.m. I don’t know why I do it, but I know I can get away with it.

My first foray into the world of patina (excluding the use of liver of sulphur on silver, and a few times using Baldwin’s Patina on some copper/bronze clay pieces) went pretty well.  I started with the verdigris because it is a cold patina and it seemed like the simplest place to start.

Copper and brass components with patina applied on left. Original finish on right. Photo taken before any sealant or wax have been applied.

Brass leaves before and after patina has been applied. Still no sealant or wax.

An example of why pieces must be solid copper, and not just copper plated. The patina reacts with the steel under the copper plate and cause rust rather than the nice green patina. The pieces on the right look so innocently like copper…

I tried a coat of sealant and wax just to learn about the process, but I’m not sure if I will find much use for “rusted propellors.” I’ll set them aside to see what they do.

Here’s the whole batch, after applying sealant and wax. Each step requires a 24 hour curing period.

My favorite pieces this time are the copper leaves I filed down and stamped, to give them a little personality before I colored them with patina. These will become earrings just as they are, or with some extra silver components.

Before:

After:
  
The patina learning curve has begun.

6 Comments

Filed under Uncategorized