Tag Archives: patina

A weird thing happens…

…when I neglect my blog. The longer I go without posting something, the harder it is to think I have something to post. I start second guessing anything I might want to say, or any photos I might want to post and then more time goes by. I get out of practice. Then I feel like I should justify how I spent my time in the last month when I didn’t blog. Sheesh. I am my own worst critic.

Life on this tiny island in Maine is crazy busy in May and June as we get ready for the summer rush of business, activities, friends, and family. I’ve been working in the studio, getting jewelry into galleries, weeding the perennial garden, planting some vegetables, spending time with my Mom, painting the bathroom, taking a two-day trip to NYC, and catching up with friends who have arrived for the summer. Who knows where the time goes. It just does. So, I’m jumping back into the blog pool and letting go of why I did or didn’t do it for over a month.

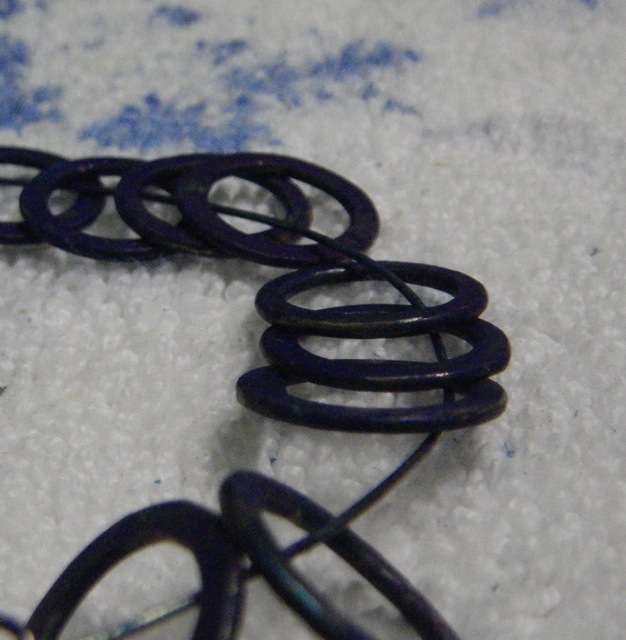
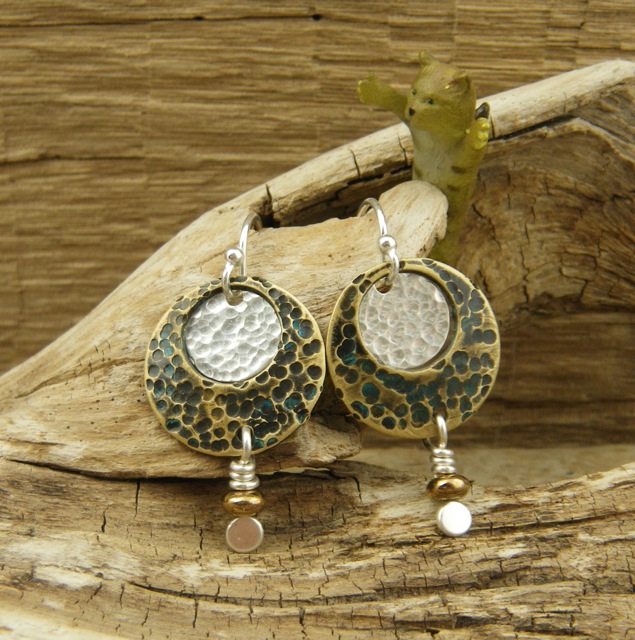
Part of my process in making jewelry is to make up a batch of components to mix and match in earring and necklace designs. I cut, hammered, and tumbled some brass discs to get them ready for applying patina. I also soldered some 14 gauge  (it might be 16)  copper wire rings and hammered them flat.

IMGP4482


Next I applied some patina solutions.

IMGP4486 IMGP4485


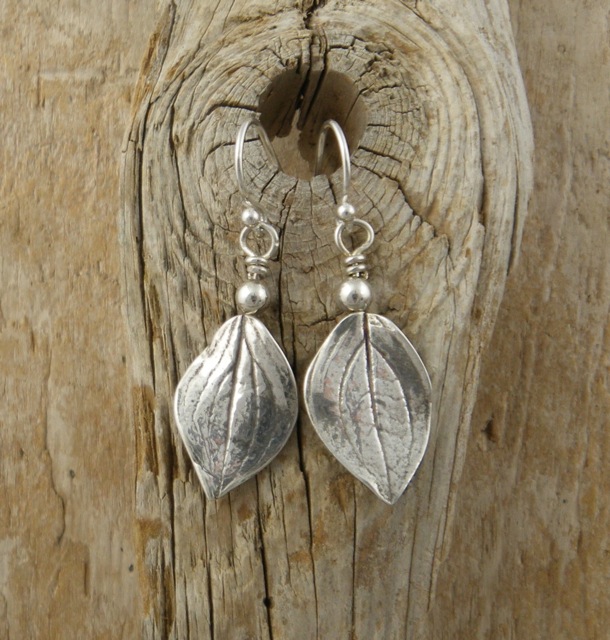
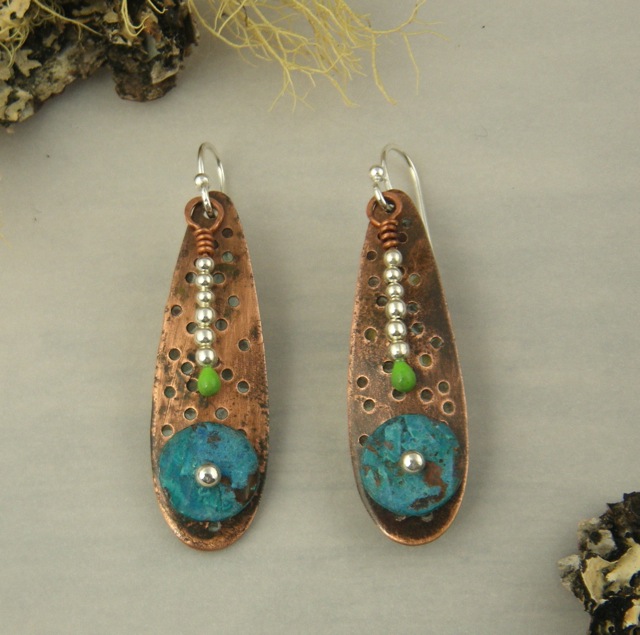
When they are sanded, sealed with lacquer, and finished with a preservation wax, they will be ready to use in earring designs like the one below.

IMGP3907


So that’s a little bit of what I’ve been up to.  And, I’ve missed telling you about it.

10 Comments

Filed under Uncategorized

Job done, time for bed

So, I had a great visit with Mom today after running around Ellsworth doing errands. After dinner I added 6 pairs of earrings to my Etsy Shop. That’s a lot for me since I usually just crash and relax after a day off island.

Here are the earrings I put in the shop tonight. Some are old standbys and some are newer designs.

IMGP3273


IMGP3286


IMGP3196


IMGP3219


IMGP3210


IMGP3225

6 Comments

Filed under Uncategorized

Patina play

Treating base metal pieces with solutions to develop patinas on the surface is how I spent a good part of my time over the weekend. I started by cleaning the pieces to make sure there was no grease on the surface.

I melted the ends of silver wire and copper wire to use as head pins for earrings. Later I would I hammer the copper wire to get a flat round surface which I would then color with a patina. But first, I cleaned the head pins by throwing them in a rotary tumbler with a little water, soap, and steel shot, to make sure they were ready to receive the patina. Goodness gracious…

I use patina solutions from Shannon LeVart of Miss Ficklemedia. After buying Shannon’s pieces for a couple of years, I decided to buy her tutorial and some supplies to try it myself. Her instructions are excellent. So is her work. Definitely check out her Etsy site. 

We had temperatures in the high 50’s today and it was sunny. The patinas had developed for more than a day so the timing was perfect for taking the batches of patin-ted pieces outside to spray with Permalac to seal the colors.

The pieces I am most excited about are the beads I made myself from copper and bronze metal clay. The patinated background with raised  designs came out just as I hoped. I especially like the russet red.

Tomorrow I’ll apply a layer of preservation wax over the lacquer and then hand buff each piece. After that the beads will be safe to wear against clothing and skin, and it will be time to make some jewelry. Sometimes I think about just making and selling beads. No matter what material I’m working with, I usually end up thinking about making beads with it. Barb the bead maker. Yeah…. Meanwhile I have plans for all of those brass paddle-shaped pieces in the first photograph. I didn’t make them, but I patina-ted them and they will end up starring in a great pair of earrings. That’s a story for another time.


Happiness is a handful of handmade head pins!

10 Comments

Filed under Uncategorized

Etsy at last!

Well, it’s a lot easier to tell someone else to take an hour a day to keep up with their Etsy site than it is to do it myself. I took the photos a while ago, but didn’t get around to listing things until this evening. I have yet to make it a part of my routine.

I did learn something, though. That is to “pin” my newest listings to Pinterest. Then someone else might see it and re-pin it to their pinboard. I still don’t get how it all works, and how people find you to follow you, but I know it’s another way to put yourself or your work out there. Free advertising is never bad. I’m afraid to look too much at Pinterest because it could be yet another thing to keep me away from the studio. (“Could be?” who am I kidding. Of course it is!)

Here are the items I listed on Etsy tonight:

The last pair of earrings, with the purple patina, have already sold. Cool beans! Thanks Karen! If that isn’t a sign to get to work on all of the pieces I have ready to patina, I don’t know what is.

4 Comments

Filed under Uncategorized

Heading to Vermont

I’m off in the morning for a 4 day class with Celie Fago in Bethel, Vermont. I’ll meet up with my friend Holly Kellogg to stay at the home of friends Donna and Henry  Isaacs. So much opportunity to be surrounded by art and creativity. I can’t wait! After the busy weeks before and after Robin and Stephanie’s wedding, and after supporting my mom as she recovered in the hospital, I am ready and more than excited to be restoring some depleted creative energy.

The workshop will be making bracelets using polymer clay, and some metal clay. Below are photos of Celie’s work as samples of the techniques we will learn.


It’s supposed to be a drizzly weekend in Vermont. I doubt I’ll even notice the weather.

Below are more earrings from my patina experiments. Copper metal clay headpins with verdigris patina. I’m having a blast exploring alternatives to using silver. These earrings remind me of something from a Dr. Seuss book. I’m not sure if that’s a good thing or not, but I’m looking forward to more work with the base metal clays and how well they accept patinas.

Time to pack!


5 Comments

Filed under Uncategorized

Seems like long ago…

…that I took my trip to Patina-ville.

Before the wedding, and before my mother fell and ended up in the hospital for 2 weeks, I actually made some earrings with these pieces. It was quite satisfying to be using my own patina-ted components. At that time, I ordered more patina colors from Miss Ficklemedia. I haven’t had a chance to try them out yet, but looking back at this work has me looking forward to more visits to the land of patina. (And less visits to the hospital. Mom is back in her apartment as of today. Yay!)

Front and back


Front and back


Pretty darn satisfying to make my own beads from copper clay, and see them come to life with added patina.


Silver was much lower in price when I discovered Shannon LeVart’s work at Miss Ficklemedia. I started combining her patinated copper beads as an accent to my own silver beads. With silver staying around $4o an ounce, I am looking for more ways to use silver as an accent to my own patinated  copper and brass pieces.


5 Comments

Filed under Uncategorized

Patina procrastination no more!

I put off working with patinas all summer until yesterday. I started out with the cold application of verdigris to get the wonderful greenish turquoise on copper and brass. The I got out my little butane torch and worked with some of the heat actived patinas for the first time. All done with the handy non-toxic water-based patina solutions and excellent instructions from Shannon and Mike at Miss Ficklemedia. I love their work, and have enjoyed purchasing and using patina-ted components from their Etsy shop so much that I wanted to try the patina process myself.

I bought many of the copper and brass elements from The Beadin’ Path, and then altered them by hammering in texture, drilling holes, and filing.


The cold applied patinas are so simple. Just dip and wait for the color to develop.

The pieces on the left are the ones I did at the beginning of the day. On the right, are pieces dipped in verdigris at the end of the day. In a few hours the color developed quite nicely.

It was so different working with the heat applied patinas. I wasn’t sure how I liked it. It seemed that copper was much easier and prettier to work with, at first. The beads below were patinated with a mixture of Persian Indigo and Old Lace White.

One of the reasons I put off working with patinas for so long is that there is no instant gratification in working with them. Does that make sense? What I mean is that these photos represent just the first step. The patinas take about 24 hours to fully develop on the metal. Then I will sand back some of the color, in places, to reveal bits of the underlying copper or brass. After sanding, I will apply 2 coats of lacquer which will then need another 24 hours to cure. The last step is to apply a coat of preservation wax to seal the lacquer. Fussy handwork done piece by piece, rubbing the wax in, letting it set for an hour or two, and then buffing it to a soft shine with cheesecloth. But then, I will have some very unique pieces to combine with bits of silver for earrings and necklace parts.

When I tried the Russet Red patina on these brass leaves, I wasn’t sure I liked the color. So, I only patinated one set in that color. I forgot, the color develops over time on the metal. I am really happy with the results. Just in time for some fall fashion earrings!


These may not look so exciting right now, but after the next two steps, they will have a soft sheen.

With patination in my box of creative tricks, I look forward to combining it with my love of working with metal clay. These funky headpins are made from copper metal clay fired on bronze, then treated with a verdigris patina. I can’t wait to see how they evolve into a pair of earrings.


14 Comments

Filed under Uncategorized

Copper, brass, patina, enameled head pins, and a bit of silver

That’s what I was working on today.

2 Comments

Filed under Uncategorized

Wax on Wax off

Applying Renaissance Wax as a final finish on pieces with patina is how I spent part of a sunny afternoon on the back porch. It was so nice to hear all the birds singing, especially the cardinals and song sparrows, and it was pleasantly promising to feel 60 degree air again. It was also a relief to work outside since the smell of this wax is not one of my favorites. Fortunately the smell is gone after it hardens. It’s not that bad, but I’m sensitive to it. As long as I was outside, I took the time to apply Butcher’s Wax as a final finish to a batch of beach rocks I drilled earlier in the week. Butcher’s smells a little better, but still it was a nice change to keep that outside, too.

So, I did lots of hand finishing this afternoon, which is a good thing for 2 reasons. The first is that I now have a bunch of new components to work with in the studio tomorrow, and the second is that I procrastinated all day from writing my “Cranberry Report” for the Working Waterfront, and completing a variety of components made me feel like I had done something productive. I might stay up late to finish the column tonight, so I don’t have a repeat of procrastination tomorrow. Ugh. I always do this when I have to write. I had hoped that keeping up with a daily post on the blog would be helpful to writing my column in a more timely manner. But…not yet. Not this month, anyway. Tomorrow is my deadline, but I usually stretch the day of the deadline out until 5 p.m. I don’t know why I do it, but I know I can get away with it.

My first foray into the world of patina (excluding the use of liver of sulphur on silver, and a few times using Baldwin’s Patina on some copper/bronze clay pieces) went pretty well.  I started with the verdigris because it is a cold patina and it seemed like the simplest place to start.

Copper and brass components with patina applied on left. Original finish on right. Photo taken before any sealant or wax have been applied.

Brass leaves before and after patina has been applied. Still no sealant or wax.

An example of why pieces must be solid copper, and not just copper plated. The patina reacts with the steel under the copper plate and cause rust rather than the nice green patina. The pieces on the right look so innocently like copper…

I tried a coat of sealant and wax just to learn about the process, but I’m not sure if I will find much use for “rusted propellors.” I’ll set them aside to see what they do.

Here’s the whole batch, after applying sealant and wax. Each step requires a 24 hour curing period.

My favorite pieces this time are the copper leaves I filed down and stamped, to give them a little personality before I colored them with patina. These will become earrings just as they are, or with some extra silver components.

Before:

After:
  
The patina learning curve has begun.

6 Comments

Filed under Uncategorized

4 necklaces

I spent so time in my studio making beads and components this past winter, that I am just now getting around to putting them together. When I look at other people’s beads to buy, I have tons of ideas. Then I sit down to work at my bead bench and feel paralyzed by the myriad of options I’ve provided myself.  After a day or so I get into a rhythm of stringing.

I love the large copper focal bead, below, made by Shannon LeVart of Miss Ficklemedia. Her patinas are gorgeous. I am inspired to give patinas a try on my own. I ordered her e-book and some of her patina colors, but in the meantime I also attended the glass bead making workshop.  I’ll give both of those techniques some time to ramble around in the back of my brain while I work with the supplies I have at hand. Shannon also made the smaller patinated beads and the toggle clasp for this necklace. I made the silver beads (except for the small round ones) from PMC, and I had the bright copper beads in my stash, along with the brass spacer beads, from years ago.  The peach-lined light blue Japanese drop beads were an impulse buy at the Beadin’ Path sometime last fall. I’m happy with how they all came together, though some of the colors (the glass beads) look a little off since I took quick photos late this afternoon.

Each beach rock necklace has its own personality. I started with a simple design to re-familiarize myself with my rock inventory. When it comes to beach rocks, I prefer to make asymmetrical necklaces, but it helps me to get going with one or two that are easily balanced.

The color of the matte glass seed beads in the photo changes with a different background. The color below is more true.

The focal bead in the first necklace, and in the one below, is a hollow drape bead made from precious metal clay.

Tomorrow = more studio time for more necklaces. The latest weather prediction is for 6 to 10″ of snow and gale force winds. I hope the power stays on!

15 Comments

Filed under Uncategorized