I’m getting ready for my last show of the year in Bar Harbor, Maine on Dec. 6 and 7. For me this means: Get out the clay! No, not ceramic clay, but polymer clay, fine silver clay and the base metal clays of copper and bronze. I make many of my own components for necklaces, earrings, and bracelets so there is a lot to be done before I actually sit down and put these components together. I’ve made a few mistakes and learned some new things in the last two weeks and I’m ready to tell all. More about the metals in a following post. Today I’m talking about polymer.
My personal discovery of polymer clay goes back to the late ’70’s when I picked up a few packages at the Kimball Shop in Northeast Harbor. I sculpted little lobsterman Christmas tree ornaments for my family and friends and baked them up in my oven. I was only just getting started in making simple earrings with sheet silver and a jeweler’s saw. It never occurred to me to mix the Fimo colors and make my own beads. I put the Fimo away for 10 years or so as I was concentrating on working with silver and mothering two babies.
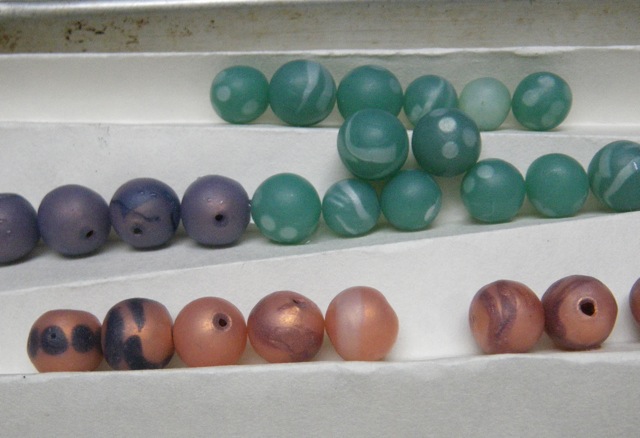
Fast forward to the early 90’s when I started seeing some incredibly intricate patterns on beads made with Fimo. How in the world did they make such tiny patterns on such tiny beads? Nan Roche’s book, The New Clay, opened up a whole new world to me and I was off and running making my own beads. They were simple slices of canes, drilled after curing, but they were beads I made, in colors I wanted. And they were a whole lot of fun to make.
 When Precious Metal Clay was introduced in the mid 1990’s I would abandon the polymer clay for many years. Besides, I had a ton of beads already made if I needed them.
Currently,the amazing things people are doing with polymer clay has drawn me back to this medium. I’m looking forward to spending whole days or weeks pushing my own polymer boundaries this winter. Presently I’m making components from translucent Pardo clay tinted with alcohol ink.
 I’m usually in such a hurry for instant gratification that I haven’t bothered to record what amounts and colors of inks I’ve used to get the finished leaf color. And, I’m never quite sure how they will come out because the Pardo clay is pretty opaque before it is cured.
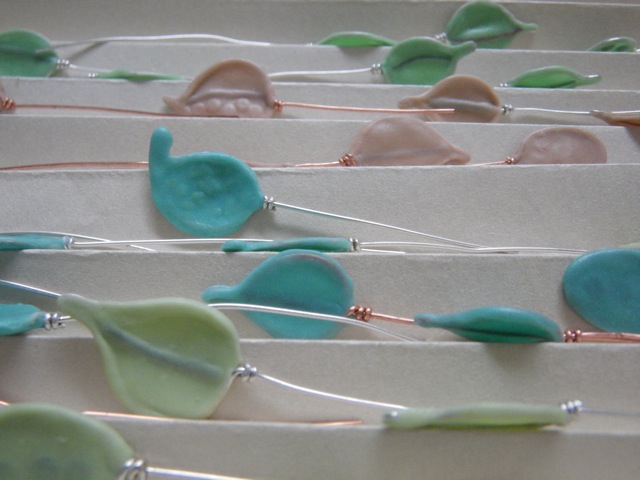
 The clay becomes even more translucent when it is cooled, straight out of the oven, in ice water.
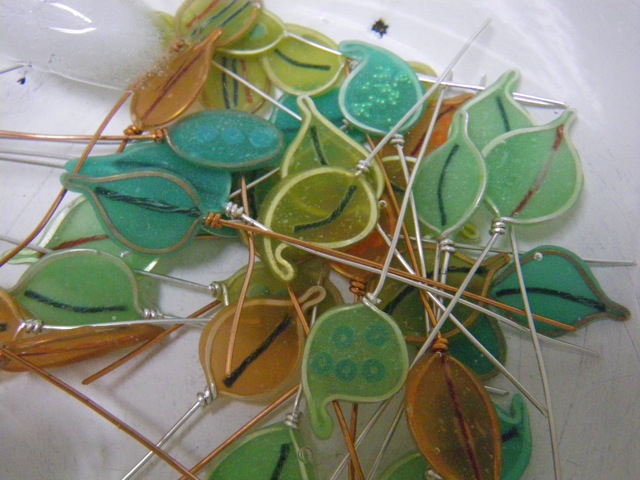 Information from Pinterest, blogs and FB have inspired me and led me in new directions. Ginger Davis Allman has a wealth of information, especially about translucent clays, on her blog Blue Bottle Tree. I’ve purchased two of her tutorials to try out this winter.
Last week I took (online) a CraftCast course on polymer clay extrusions by Cynthia Tinapple who is an amazing polymer clay artists and writes the blog Polymer Clay Daily. I already had a great set up for extruding polymer clay with the help of an electric drill thanks to one of her earlier posts last summer. I hadn’t used the drill or the technique since August, but I would soon be trying it again.
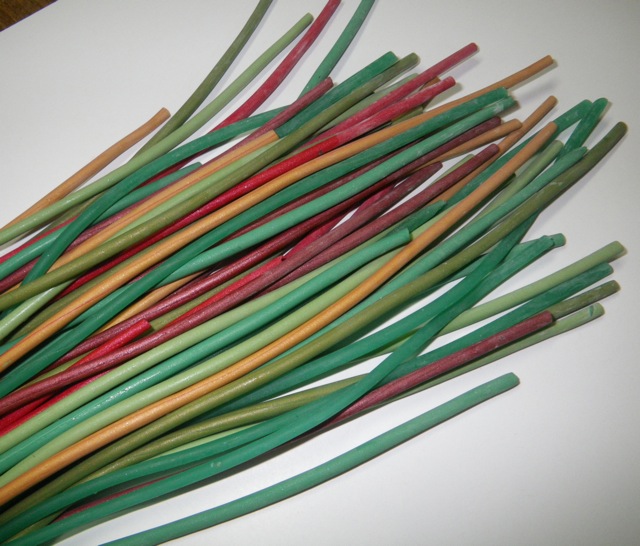
My desire to make more of these bracelets for my shows turned into an unplanned extrusion experiment. I discovered I did not have the stash of these flexible tubes that I thought I did. Where oh where had I bought those colorful tubes, on Etsy? I looked through my purchase info and found out they had come from Mary Soucy’s Etsy shop, Bead Me A Story. It’s a very cool shop and if you have been trying to find those amazing rubber o-rings for your designs, look no further than here. She has them! But what she did not have anymore were the “flexible bugle beads” I sought. I looked everywhere with the help of Google, but I couldn’t find them. I contacted Mary to ask if she would be willing to tell me where I could find them.
“No they are not available although I was the person who made them. Those were handmade beads made from Polymer Clay. I had to discontinue making them b/c they became too labor intensive and my hands and back couldn’t do it anymore. Sorry but they are all gone.”
I asked if she would be willing to sell me a tutorial on how they were made. She said that she had used some softer matte finish clays that were no longer available, and “Basically they are just made with a clay extruder “Makin” was the brand of extruder I used and then you can buy tips which make the holes in the tubing as you extrude it. I don’t remember what store I used to use but the hole makers are the same brand as the extruder.
That’s about all I can tell you. That, and that it takes very strong hands to extrude clay.”
Before I even looked for the tip I needed, I sent Mary the link to Cynthia’s post on extruding clay with the help of a drill. “Sweet tip!” was her reply. It is a true hand saver.
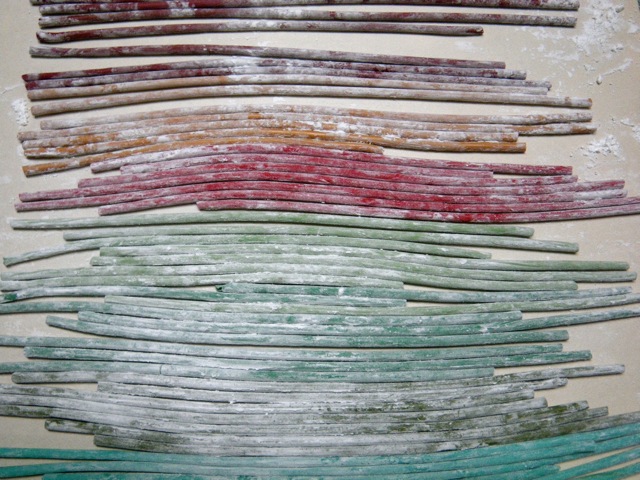
Thanks to island living and Amazon Prime, I am a very resourceful internet shopper. I had the extruder tip I needed within two days. And with a bit of a learning curve that involved a few wisps of smoke coming out of my drill (one needs to have very very soft clay to push it through the two-tip combo for making small tubing) I was making my own slightly flexible tubing. I used cornstarch to keep the tubes from sticking together while fitting as many as I could on the tray to go in the oven. This new-to-me process totally worked!
 Now I need to get back to the studio to make some bracelets.